Backups
The Backups tab in the admin panel makes encrypted backups of the whole instance on a schedule, copies them to another server or to cloud storage, and shows whether recent ones worked. A backup holds everything needed to bring the instance back on a new server: the database (every net, check-in, chat message, user, and setting), every uploaded profile photo, chat image, and logo, and the server’s configuration.
Only admins see the tab. Restoring a backup is a job for whoever runs the server, and it happens at the command line, not here. Backups for server operators covers that side.
Set the backup passphrase
Nothing is backed up until there is a passphrase, because every backup is encrypted with it.
- Open the admin panel and choose the Backups tab.
- In Encryption, click Set passphrase.
- Enter a passphrase of at least 12 characters twice, and click Save.
- Write the passphrase down somewhere other than this server, such as a password manager.
The server keeps no copy of the passphrase. That is deliberate: someone who broke into the server could otherwise decrypt every backup already sent off-site. It also means a lost passphrase cannot be recovered by anyone, and backups made with it can no longer be opened.
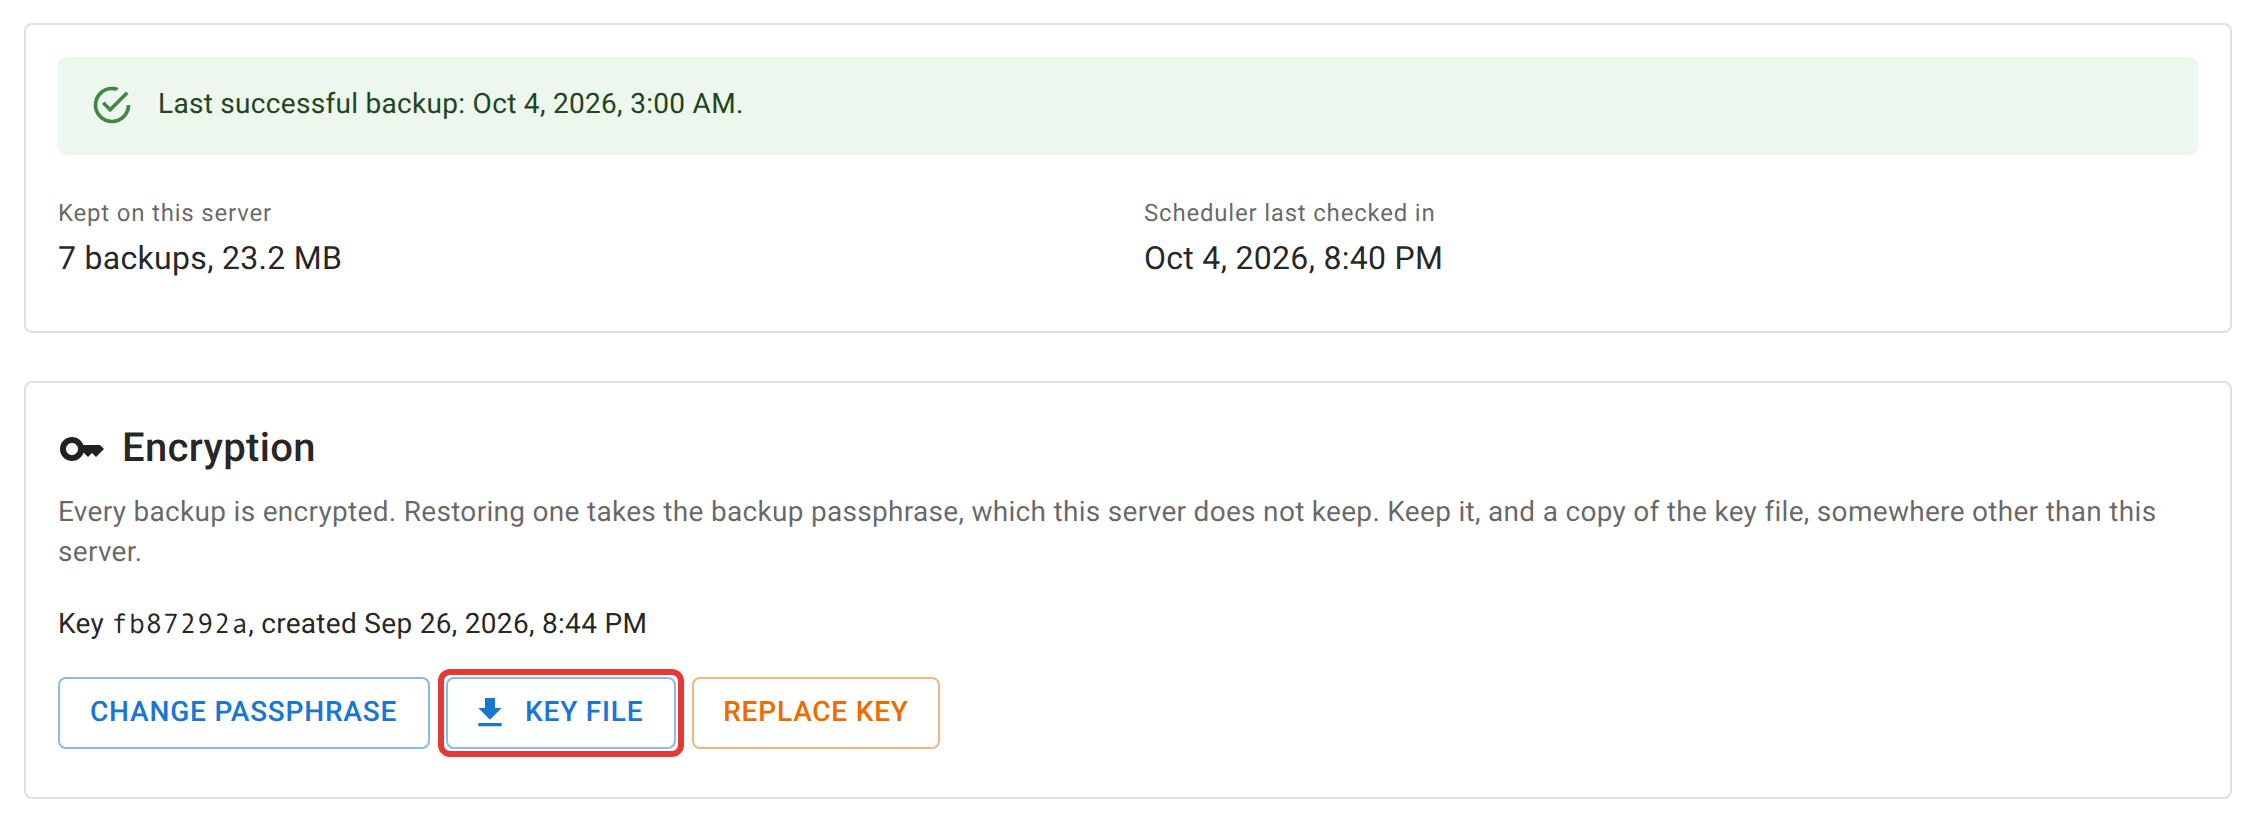
Key file downloads the small file that holds the encryption key, itself locked by the passphrase. A copy of it is already saved beside every backup, so you only need your own copy if you keep backups somewhere the app doesn’t put them.
Turn on the schedule
- In Schedule, turn on Scheduled backups.
- Under How often, choose Once a day and a time and time zone, or Every few hours and an interval.
- Under Keep on this server, set how many daily, weekly, and monthly backups to keep. The defaults (7, 4, and 6) keep a week of dailies and about half a year in total.
- Click Save schedule.
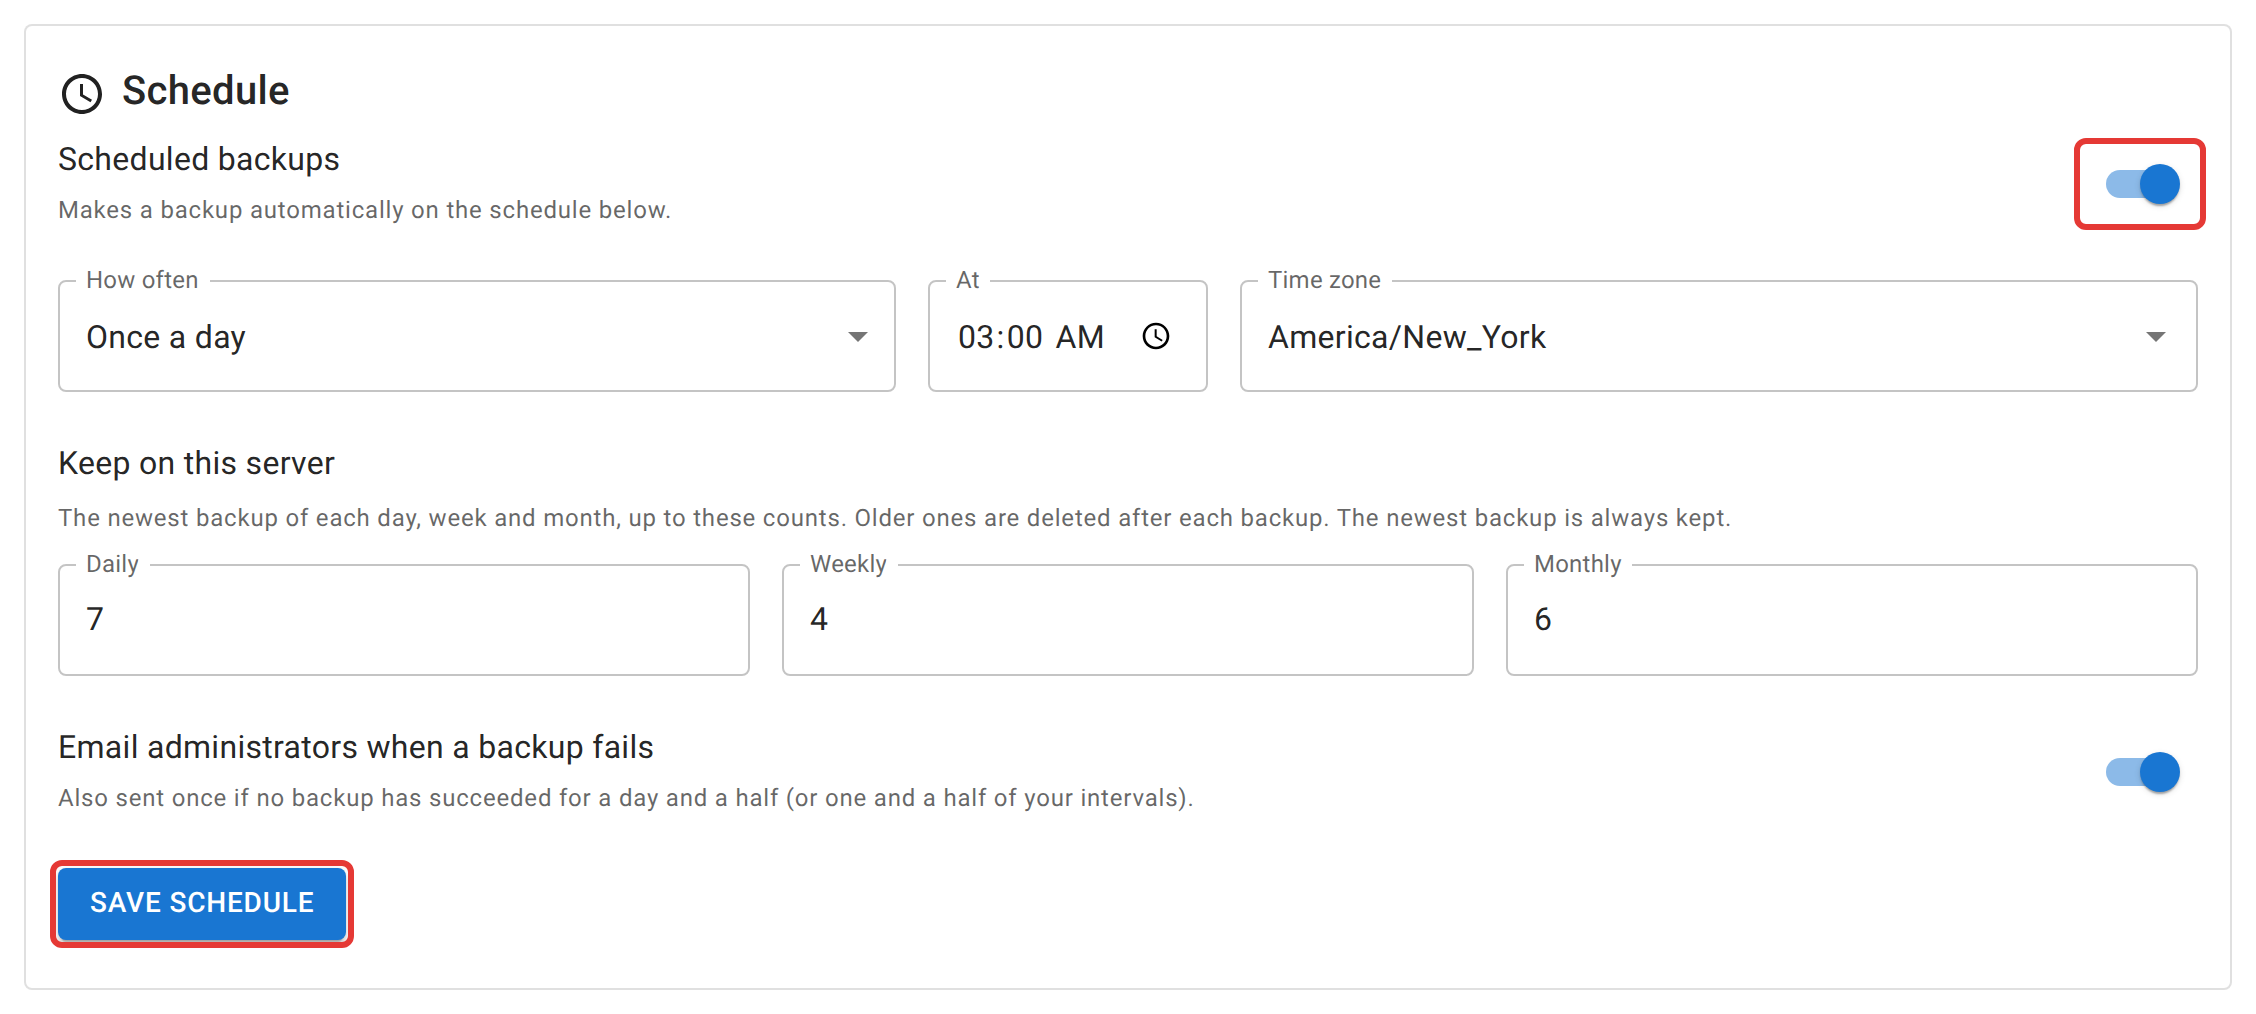
The first backup runs within about 15 minutes of turning the schedule on, so you find out straight away if something is wrong. After that it follows the schedule.
Back up now, at the top of the tab, makes one immediately, whatever the schedule says. It works even with the schedule off.
Add an off-site copy
A backup that lives only on the server is lost with the server. An off-site target gets a copy of every backup, already encrypted, so whoever runs that storage never sees your data.
- In Off-site copies, click Add target.
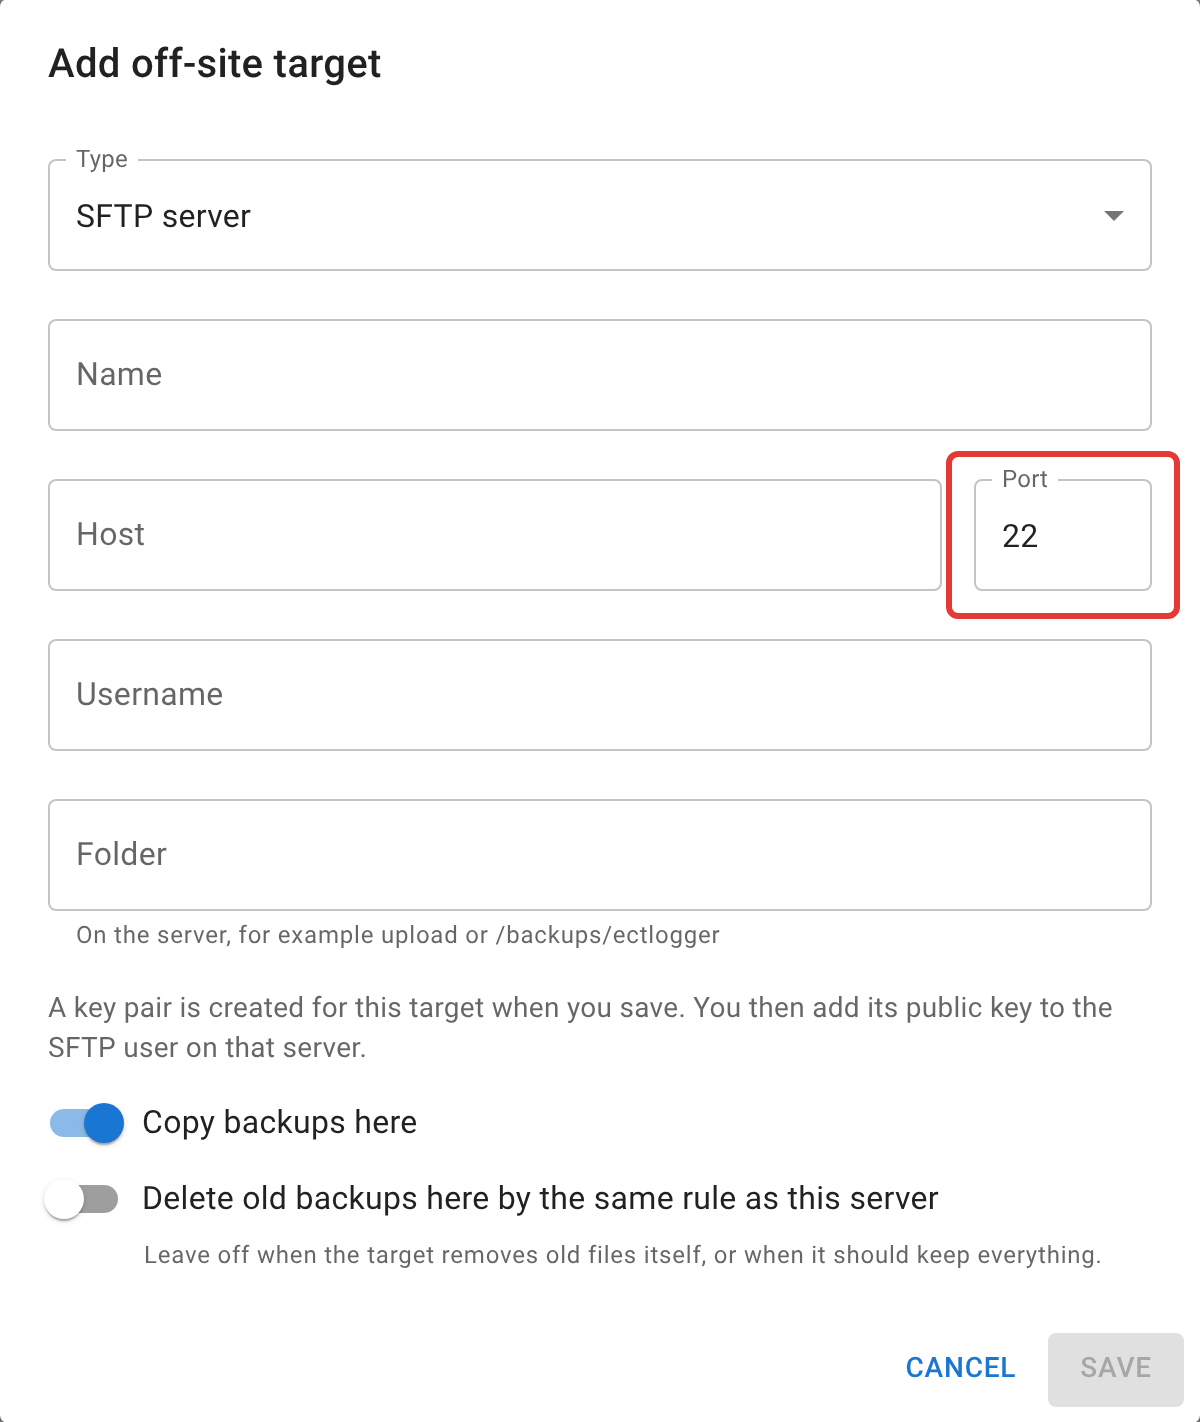
- Choose the type: SFTP server, or S3-compatible storage (Backblaze B2, Wasabi, AWS, MinIO, and others).
- Fill in the connection details and click Save.

For an SFTP server, enter the host, the port (22 unless whoever runs the server says otherwise), the username, and the folder to upload into. A wrong port looks like a server that never answers: the connection test waits and then times out.
Once saved, the app creates a key pair for the target and shows its public key. Give that line to whoever runs the SFTP server to add to the upload account, then click the Test connection icon on the target. The first test shows the server’s host key fingerprint. Compare it with the one the server’s operator gives you, and click Trust this key. Nothing is sent to an SFTP server before you do, and if its host key ever changes, backups to it stop until you trust the new one.
For S3-compatible storage, enter the endpoint URL (blank for AWS), the bucket, and an access key that can write to it. A key that can only write to one bucket is the right kind to use.
Each target has two switches:
- Copy backups here — turn off to pause a target without deleting its settings.
- Delete old backups here by the same rule as this server — off by default. Leave it off when the target removes old files itself or should keep everything. An off-site copy the app can delete is also one an intruder on the server could delete.
Check that a backup works
A backup that has never been opened is a hope, not a backup. To check one:
- In Recent backups, click the Check this backup icon on its row.
- Enter the backup passphrase and click Check.
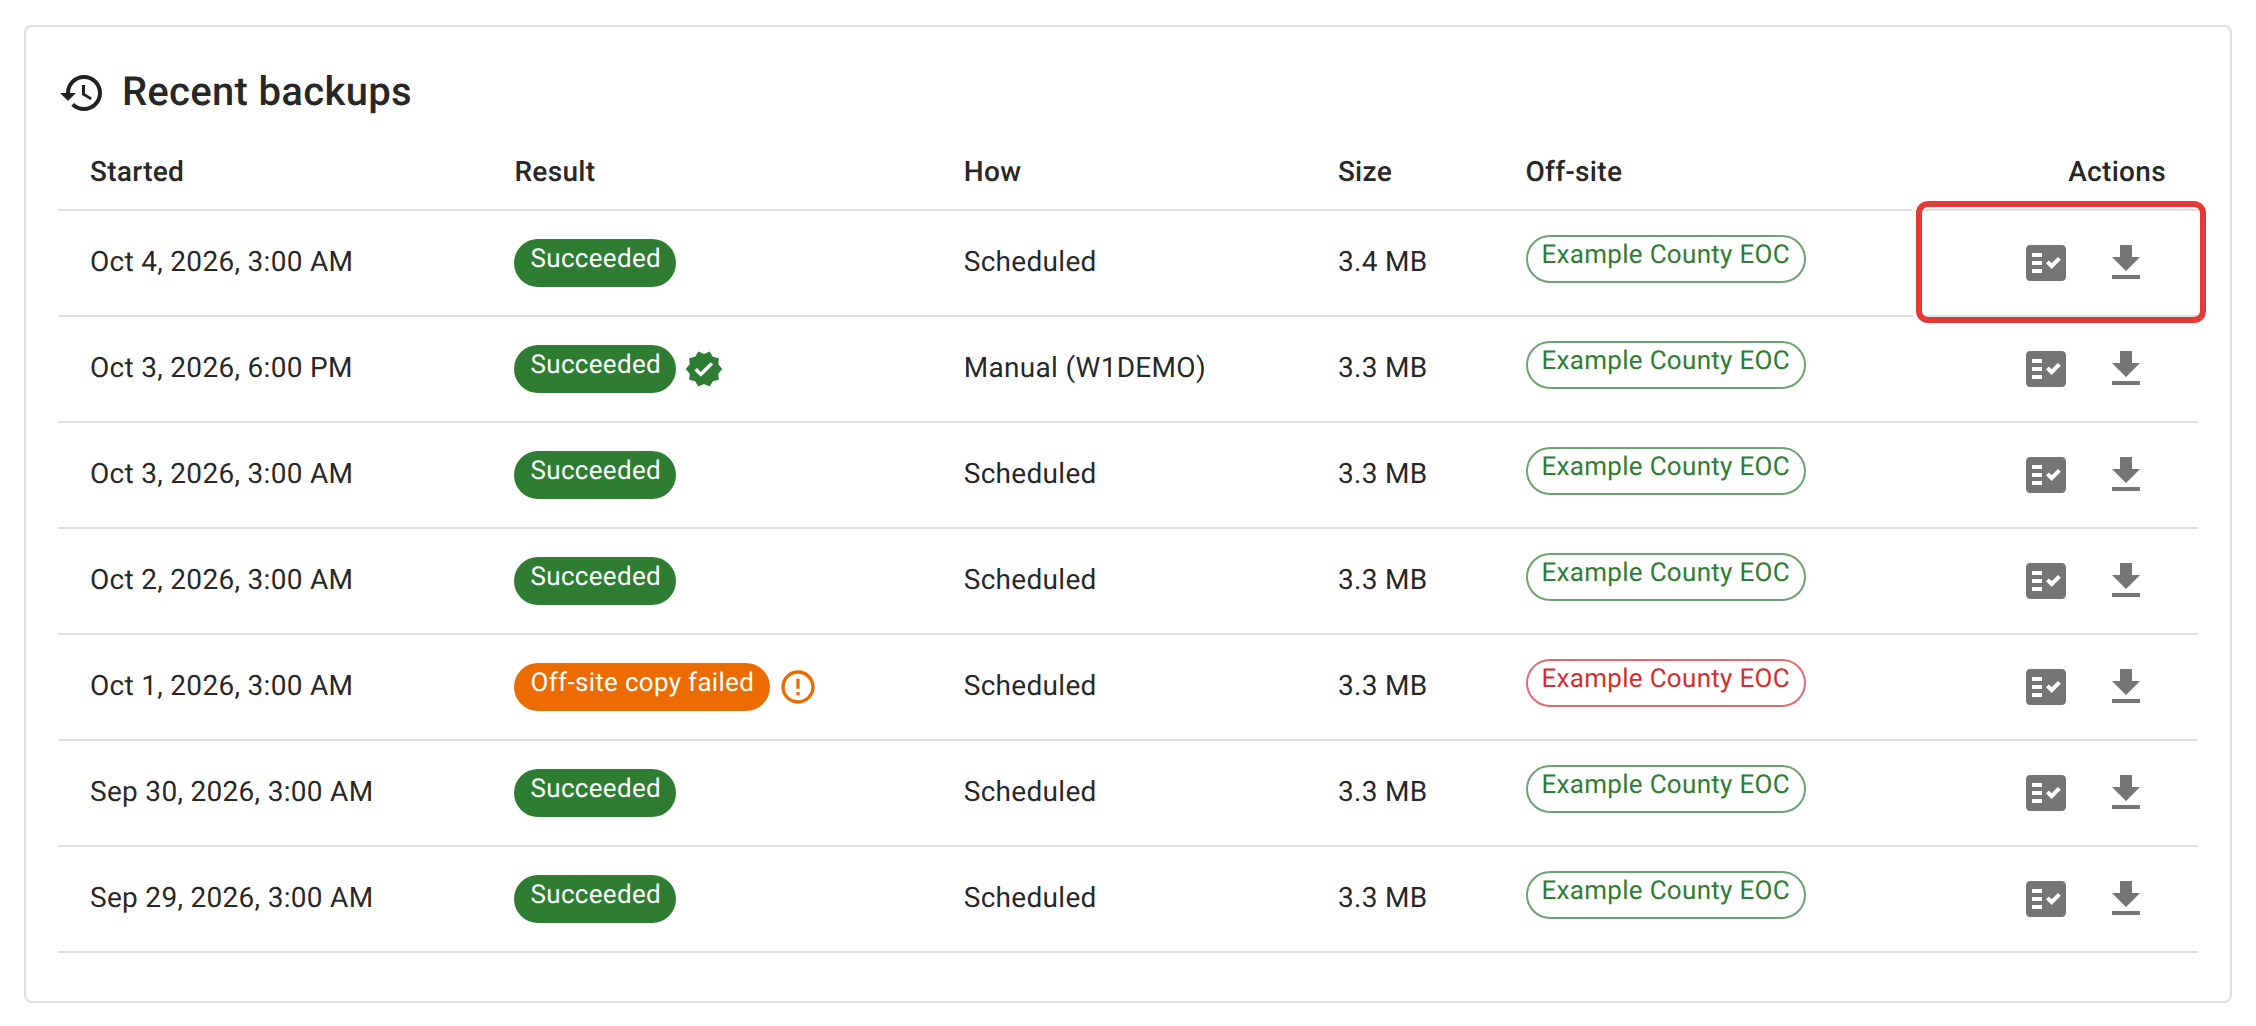
The server decrypts the backup and compares every file against the checksum recorded when it was made, then checks the database for damage. It also confirms that the configuration saved in the backup can still unlock everyone’s two-factor sign-in. A restore that got that wrong would bring every net back but lock every admin out. Nothing is changed. When it passes, the dialog shows how many users, nets, check-ins, and uploaded files the backup holds, so you can see it is the instance you expect.
A row that passed shows a check-mark icon; hover over it to see when, and the same report. Doing this once after setting up, and again after changing the passphrase, proves you have the right passphrase before you ever need it.
Download a backup
- In Recent backups, click the Download (encrypted) icon on its row.
- Enter a current code from your authenticator app and click Download.
The file stays encrypted. Because it is the whole database, every download needs a fresh two-factor code, and every administrator gets an email naming who downloaded which backup.
Emails when something goes wrong
With Email administrators when a backup fails on (the default), every admin gets an email when:
- a backup fails, with the reason;
- a backup was made but an off-site copy did not arrive, naming the target;
- no backup has succeeded for one and a half schedule periods (36 hours on a daily schedule). This one is sent once, and not again until a backup succeeds, and it catches the case where nothing is running backups at all.
The top of the tab shows the same thing: when the last good backup was, and a warning if the server’s scheduler has stopped checking in.
Things that surprise people
Change passphrase keeps every backup readable. The key stays the same and only the passphrase that unlocks it changes, so old backups open with the new passphrase. You need the current passphrase to change it.
Replace key starts over. Use it only when the old passphrase is lost or exposed. Backups made after it use a new key; backups made before it still need the old passphrase. Both key files stay beside the backups.
The newest backup is never deleted, whatever the retention counts say.
The backup folder is set on the server, not here. The tab shows where it is. An admin session cannot point backups at another folder.
“Removed by retention” on a history row means the file has been deleted from this server under the retention rule. It may still exist on an off-site target.
Next
Backups for server operators covers restoring a backup, moving an instance to a new server, and setting up a safe SFTP drop point. Security, MFA, and lockouts covers the two-factor codes the download asks for.